SCIENTIFIC METHOD
What is the Scientific Method? (Video)
Reading passage and practice quiz
Steps of the Scientific Method
1. Ask a Question
The scientific method starts when you ask a question about something that you
observe: How, What, When, Who, Which, Why, or Where?
For a science fair project some teachers require that the question be something
you can measure, preferably with a number.
For detailed help with this step, use these resources:
2. Do Background Research
Rather than starting from scratch in putting together a plan for answering your
question, you want to be a savvy scientist using library and Internet research to
help you find the best way to do things and ensure that you don't repeat mistakes from the past.
For detailed help with this step, use these resources:
3. Construct a Hypothesis
A hypothesis is an educated guess about how things work. It is an attempt to answer your question with an explanation that can be tested. A good hypothesis allows you to then make a prediction:
"If _____[I do this] _____, then _____[this]_____ will happen."
State both your hypothesis and the resulting prediction you will be testing. Predictions must be easy to measure.
For detailed help with this step, use these resources:
4. Test Your Hypothesis by Doing an Experiment
Your experiment tests whether your prediction is accurate and thus your hypothesis is supported or not. It is important for your experiment to be a fair test. You conduct a fair test by making sure that you change only one factor at a time while keeping all other conditions the same.
You should also repeat your experiments several times to make sure that the first results weren't just an accident.
For detailed help with this step, use these resources:
5. Analyze Your Data and Draw a Conclusion
Once your experiment is complete, you collect your measurements and analyze them to see if they support your hypothesis or not.
Scientists often find that their predictions were not accurate and their hypothesis was not supported, and in such cases they will communicate the results of their experiment and then go back and construct a new hypothesis and prediction based on the information they learned during their experiment. This starts much of the process of the scientific method over again. Even if they find that their hypothesis was supported, they may want to test it again in a new way.
For detailed help with this step, use these resources:
6. Communicate Your Results
To complete your science fair project you will communicate your results to others in a final report and/or a display board. Professional scientists do almost exactly the same thing by publishing their final report in a scientific journal or by presenting their results on a poster or during a talk at a scientific meeting. In a science fair, judges are interested in your findings regardless of whether or not they support your original hypothesis.
For detailed help with this step, use these resources:
Frequently Asked Questions
What are the six steps of the scientific method?
The six steps of the scientific method include: 1) asking a question about something you observe, 2) doing background research to learn what is already known about the topic, 3) constructing a hypothesis, 4) experimenting to test the hypothesis, 5) analyzing the data from the experiment and drawing conclusions, and 6) communicating the results to others.
What is a scientific method example?
A simple example of the scientific method is:
-
Ask a Question: Why does Greenland look so large on a map?
-
Background Research: Learn that Greenland is a quarter the size of the United States in land mass. Also learn that Mercator projection maps are made by transferring the images from a sphere to a sheet of paper wrapped around the sphere in a cylinder.
-
Hypothesis: If I make a Mercator projection map, then the items in the middle of the map will look their true size and the items at the poles will look larger than they really are.
-
Experiment: Use a sphere with 1-inch by 1-inch squares at each pole and the equator to make a Mercator projection map. Measure the squares on the Mercator projection map.
-
Analyze Data and Make Conclusions: The middle-of-the-map squares average 1 inch per side while the squares at the poles average 3 inches per side. In conclusion, the projection process used to make Mercator projection maps creates distortion at the poles, but not at the equator. This is why Greenland, which is close to the North Pole, looks larger than it is.
-
Communicate: Make a video, write a report, or give a presentation to educate others about the experiment.
Who invented the scientific method?
The scientific method was not invented by any one person, but is the outcome of centuries of debate about how best to find out how the natural world works. The ancient Greek philosopher Aristotle was among the first known people to promote that observation and reasoning must be applied to figure out how nature works. The Arab Muslim mathematician and scientist Hasan Ibn al-Haytham (known in the western world as Alhazen) is often cited as the first person to write about the importance of experimentation. Since then, a large number of scientists have written about how science should ideally be conducted and contributed to our modern understanding of the scientific method. Those scientists include Roger Bacon, Thomas Aquinas, Galileo Galilei, Francis Bacon, Isaac Newton, John Hume, and John Stuart Mill. Scientists today continue to evolve and refine the scientific method as they explore new techniques and new areas of science.
Do scientists actually use the scientific method?
Scientists do use the scientific method, but not always exactly as laid out in the organized steps taught in the classroom. Just like a chef might make a few changes to a recipe because of the ingredients at hand, a scientist may modify the scientific method by skipping steps, jumping back and forth between steps, or repeating a subset of the steps because he or she is dealing with imperfect real-world conditions. But scientists always strive to keep to the core principles of the scientific method by using observations, experiments, and data to support or reject explanations of how a phenomenon works. While experimenting is considered the best way to test explanations, there are areas of science, like astronomy, where this is not always possible.
Source: Science Buddies. 2012. “Steps of the Scientific Method.” Science Buddies. 2012. https://www.sciencebuddies.org/science-fair-projects/science-fair/steps-of-the-scientific-method.
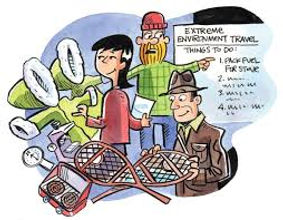
EXTREME ENVIRONMENTS
In science, we started with extreme environments and will be starting a partnered PowerPoint research assignment. Students will have one week in class to finish this (4 - 5o minute classes), which consists of six questions. After the PowerPoint, the final objective will be to create a miniature prototype that will assist humans in living and surviving. The assignment is located below as well as the marking rubric.
Extreme Environment Assignment
Extreme Environment Presentation Rubric
RESOURCES FOR RESEARCH AND PROTOTYPE PROJECT
Click on the above picture for the video
WEBSITES
EXTREME ENVIRONMENTS
Exploring Extreme Environments - BC Probe Textbook
TECHNOLOGIES USED TO EXPLORE EXTREME ENVIRONMENTS
From Sea to Space / Robots Explore Extreme Environments
Technology for exploring volcanoes
ROPOS is a Canadian-built deep sea submersible
Canadarm2, the Canadian robotic arm of the International Space Station
VOLCANOES
National Geographic Kids - 17 Explosive Volcano Facts!
Easy Science for Kids - Volcanoes
All About Volcanoes for Children
Exploring Extreme Environments
DESERTS
Exploring Extreme Environments - Deserts
POLAR REGIONS
World Wildlife Fund - Polar Regions
National Geographic Kids - 10 Facts About the Arctic
Science for Kids Club - Polar Climates
Exploring Extreme Environments - Polar Regions
Traditional Inuit means for surviving the Arctic region
- History Museum Exhibitions Treasure
- History Museum Exhibitions Watercraft
OCEANS
Ocean Facts! National Geographic Kids
Ocean Portal - National Geographic Kids
Life in the Deep Ocean - Windows to the Universe
VENUS and NEPTUNE Programs - Canadian Technologies
Exploring Extreme Environments - Ocean
SPACE
Why do astronauts wear spacesuits?
What if an astronaut went on a space walk without wearing a space suit?
Exploring Extreme Environments - Space
___________________________________________________________

ELECTRICITY AND ELECTROMAGNETISM
In science, we started with learning about different forms of energy and how does electrical energy work. This unit will consist of note taking and many hands-on labs. A few things we will be doing is building circuit boards and playing with snap circuits to discover the flow of current and the different types of circuits. In May, we will be attending a field trip to the Revelstoke Hydro Dam for a tour!
DEMO LAB #1
Static Electricity Lab Handouts
SNAP CIRCUITS STUDENT LAB #2
Snap Circuits lab
Snap Circuits teaches basic engineering,
electronics and circuitry concepts by using
building components with snaps to
assemble electronic circuits on a simple
“rows-and-columns” base grid. The
resulting projects function like the printed
circuit board found in most electronic products.
Each Snap Circuits part is easily identifiable by
a different color and purpose,
SERIES & PARALLEL STUDENT LAB #3
Students used double sided conductive copper tape, diodes, and CR2032 batteries to construct working circuits. This was a learning curve as the placement of the diodes was very important. For many this was a true re-build and re-test.


ELECTROMAGNETISM
Electromagnetism student notes & questions
Lab #1 - Visualizing Magnetic Fields
Lab #2 - Building an Electro -Magnet
SCIENCE


2025-2026 SCHOOL YEAR
CHEMISTRY UNIT
During our chemistry unit, students will explore particles, states of matter, and changes in substances. They will learn that matter is made of particles too small to see, and investigate physical and chemical changes through hands-on inquiry (e.g., dissolving, melting, mixing, and reactions). Emphasis is placed on evidence-based reasoning, observation, and safety in lab work.
Students will then build on this by examining the Periodic Table of Elements, atomic structure, and the classification of elements and compounds. They will explore how elements combine to form new substances and how chemical reactions relate to everyday materials and environmental processes.
The focus is on inquiry, pattern recognition, and real-world application, encouraging students to see chemistry as both a creative and investigative process connected to the world around them.
RESOURCES
Video
Atoms for kids is an introduction video that helps students learn all about atoms.
What is inside an atom? Protons, Electrons and Neutrons
Let's take a look at the particles and forces inside an atom. This contains information about Protons, Electrons, and Neutrons, as well as the Electric force and Strong force.
Element Research Project
In this project students will adopt an element from the periodic table. They will select an element with atomic number 1-36 in class. As a proud parent of their element they will create a baby scrapbook page to remember each stage of their element’s life.
REQUIREMENTS: scrapbook pages must be completed on 8.5x11 (letter) size paper. Use the scrapbook paper, provided. Students may not use more than 4 pages (2 front and back) Use creativity to design scrapbook pages with all of the following requirements.
BIRTH CERTIFICATE/ INFORMATION- 4 points each
Name of Element (give your element a first name)
____Nickname of element (Symbol)
____Birth date (date element was discovered)
____Birth weight (atomic Mass)
____Birth height (atomic number)
____Race (type of element)
____Attending physician (discoverer)
____Gender (state of matter at room temperature)
____Place of birth (country of discovery)
____Personality (emotions: boiling point and melting point)
____Signature and print of Parent name (your first and last name)
PORTRAITS- 30 points
____Picture of element (Bohr model)- 5 pts
____Family portrait and names of brothers and sisters (Draw Bohr model of all family members to period 4)- 10 pts
____Family Name (family or group)-5 pts
____Address (period + discoverer’s last name + drive, lane, circle, court, road, or way)- 5 pts
____ Picture of element box on the periodic table- 5 pts
FUTURE- 10 points
____Career of element (what your element will become when it grows up)
____Picture of career
PRESENTATION- 20 points
____ (Creativity, Neatness, Effort, Spelling)
_____________________________________________________________________________________
Research Websites (From the Assignment)
1. Los Alamos National Laboratory Periodic Table
http://periodic.lanl.gov/index.shtml
✔ Clear discovery info
✔ Reliable scientific source
✔ Great for boiling/melting points, family groups
Citation:
“Periodic Table of Elements: Los Alamos National Laboratory.” 2018. Lanl.gov. 2018. http://periodic.lanl.gov/index.shtml.
2. WebElements
✔ Accurate scientific info
✔ Helpful element facts & atomic structure diagrams
✔ Good for older or more advanced students
Citation:
Winter, M. (2014). The periodic table of the elements by WebElements. Webelements.com. http://www.webelements.com/
Top Student-Friendly Element Research Websites
1. Jefferson Lab – It’s Elemental
https://education.jlab.org/itselemental/
✔ Super clear and simple
✔ Lists discovery date, discoverer, melting/boiling point, uses
✔ Perfect for grades 5–7
✔ No ads, easy to read
Citation:
It’s Elemental - The Periodic Table of Elements. (2018). Jlab.org. https://education.jlab.org/itselemental/
2. Chem4Kids
https://www.chem4kids.com/files/elem_intro.html
✔ Explains elements in kid-language
✔ Great for basic understanding
✔ Includes families/groups, characteristics, and examples
Citation:
Andrew Rader Studios. (2014). Chem4Kids.com: Elements & Periodic Table. Chem4kids.com. https://www.chem4kids.com/files/elem_intro.html
3. Ducksters Chemistry – Elements
https://www.ducksters.com/science/chemistry/
✔ Very kid-friendly
✔ Simple definitions of element families, metals vs. non-metals
✔ Has separate pages for many common elements
Citation:
Science: Chemistry for Kids. (2018). Ducksters.com. https://www.ducksters.com/science/chemistry/
4. Periodic Table – Royal Society of Chemistry (RSC)
https://www.rsc.org/periodic-table/
✔ More detailed but very visual
✔ Includes discovery info, uses, state of matter
✔ Great for Bohr model understanding & families
Citation:
Royal society of chemistry. (2019). Periodic Table – Royal Society of Chemistry. Rsc.org. https://www.rsc.org/periodic-table/
Interactive / Fun Options
1. PTable (Interactive Periodic Table)
✔ Students can toggle properties like boiling point, melting point
✔ Shows where the element lives in the table
✔ Very visual and engaging
Citation:
Dayah, M. (2017). Dynamic Periodic Table. Ptable.com; Ptable. https://ptable.com
2. National Geographic Kids – Chemistry
https://kids.nationalgeographic.com/science
✔ Good for element uses, careers, real-life connections
✔ Fun, readable, high-interest
Citation:
Science Lab. (n.d.). National Geographic. https://kids.nationalgeographic.com/science
Best For Bohr Models
Students often need help visualizing electrons. Try:
1. ChemCollective – Visual Elements
http://chemcollective.org/activities/tutorials
✔ Explains energy levels and electrons simply
✔ Good for extra support drawing Bohr models
Citation:
ChemCollective. (2025). Chemcollective.org. http://chemcollective.org/activities/tutorials

